
What is SAG?
from canecreek.com
ARTICLE
11/5/20243 min read

“SAG” refers to the amount of suspension travel that is compressed when the bike is on flat ground under rider weight and riding gear. Setting the correct amount of sag on your suspension plays a crucial role in the overall performance of your full suspension mountain bike. Setting sag should always be the first step in setting up your suspension.
You might be thinking, why is setting sag so important? Sag affects the geometry of the bicycle, and frame designers design frames with geometry and sag in mind – ideally you would want to experience the bike in the way it was intended and designed to be ridden. When you have too much sag, you do not have a high enough spring rate to support your rider weight. This can result in pedal strikes and the suspension going through it’s travel too easily, and “bottoming out” often, and with rear shocks, this can result in pedal strikes and less pedaling efficiency.
When you do not have enough sag, or the spring rate is set too high, you risk not utilizing all of your suspension travel, and again affecting the intended geometry and overall performance of the bicycle.
We recommend first checking with your bicycle manufacturer on the suggested amount of sag they intended for your bike. If that information is not available to you, we recommend 25-35% sag depending on your shock size and intended use.
HOW DO I MEASURE SAG?
STEP 1
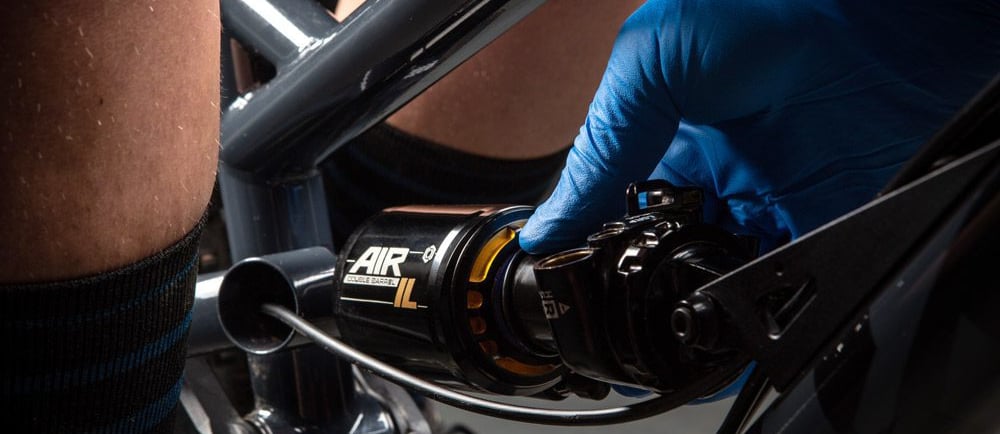
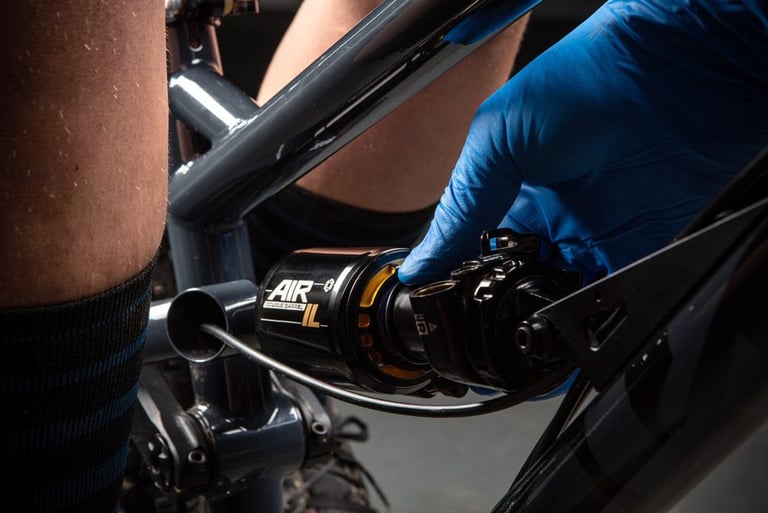
With air shocks, the first step is to charge the air spring (pump air into the air valve) to around 100 psi. Take your shock pump off and find a place to cycle the shock through it’s travel 15-20 times. This is to ensure that the positive and negative air chambers are equalized. Put your shock pump back on, then pump the shock up to around your rider weight. Take the pump off and cycle the air through the shock again. Find a flat surface and have your normal riding gear on and get into a ready position, and try not to move. If you ride on trails that require you to be out of the saddle and in an attack position frequently, set sag when you are in your attack position. If you are riding on paved trails where you are mostly seated while pedaling, set sag when you are in the seated position.
STEP 2
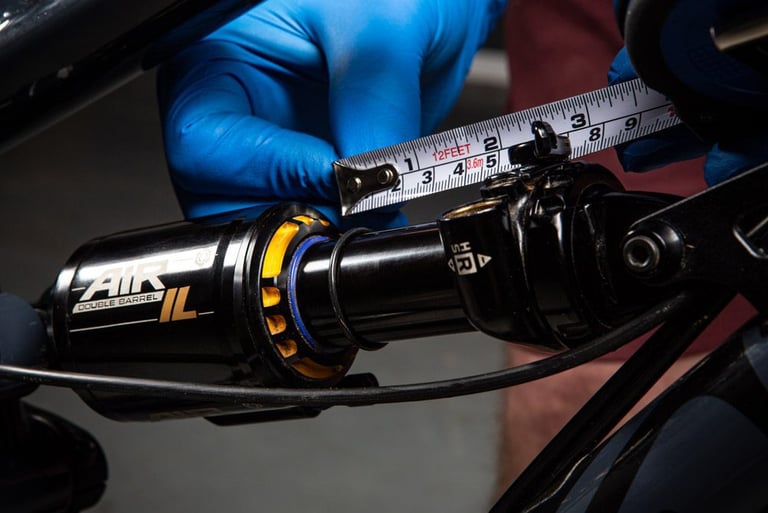
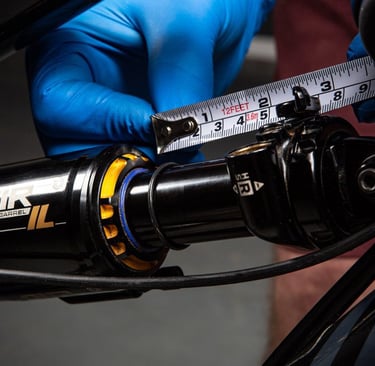
Slide the travel indicator o-ring all the way down to the wiper seal. Being careful not to bounce the suspension, dismount the bike. Measure the distance between the wiper seal and the o-ring.
STEP 3
Take that measurement and divide it by the shock’s stroke, then multiply that number by 100, and you should have the percentage of sag that is currently set. For example, on a 210X55mm shock, if you were to measure 13mm of sag, that would be 23.63% sag: 13 / 55 = 0.2363 X 100 = 23.63. In this case, you would want to drop some pressure out of the shock so you could get closer to 25-35% sag.


Seated Position
Attack Position
Attack Position
Barokah Bike
Find Your Happiness, HERE...
Jl. Sarangan Atas 36C Malang
(+62) 851-7201-1488
© 2024. All rights reserved.